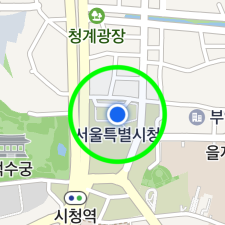
Location Overlay
Location overlay is a special overlay showing a user’s location, and only one location overlay exists on the map. Similar to markers, it displays an icon to represent a user’s location. It also allows you to easily specify the direction in which the user looks, and to add a sub icon, shadow and circle.
Access to object
A LocationOverlay object is dependent on a map object. Since there is only one location overlay object on a map, you cannot directly create an instance; you should call the NaverMap.getLocationOverlay() method to get an instance. As it always belongs to the map, the map property cannot be changed. Even if you set null or another map object in the map, nothing changes.
Therefore, you should change the visibility of the location overlay to show or hide it. The visibility of the location overlay is set to false by default. If the visibility is set to true, the location overlay appears on the map.
The following code example gets a location overlay object from the map and changes its visibility to true.
LocationOverlay locationOverlay = naverMap.getLocationOverlay();
locationOverlay.setVisible(true);
Java
LocationOverlay locationOverlay = naverMap.getLocationOverlay();
locationOverlay.setVisible(true);
Kotlin
val locationOverlay = naverMap.locationOverlay
locationOverlay.isVisible = true
Coordinates and bearing
The position property specifies the coordinates of a location overlay. The location overlay created first is located at the initial coordinates of the camera.
The following code example changes the coordinates of the location overlay.
locationOverlay.setPosition(new LatLng(37.5670135, 126.9783740));
Java
locationOverlay.setPosition(new LatLng(37.5670135, 126.9783740));
Kotlin
locationOverlay.position = LatLng(37.5670135, 126.9783740)
The bearing property specifies the bearing of the location overlay. Similar to the angle of a marker for which flat is true, the icon is rotated around the map.
The following code example changes the bearing of a location overlay to the east.
locationOverlay.setBearing(90);
Java
locationOverlay.setBearing(90);
Kotlin
locationOverlay.bearing = 90f
Icon
The location overlay uses an icon to show a user’s current location. The icon cannot be omitted, and its image and size can be changed.
Image
The icon property specifies an icon for the location overlay. Before specifying an icon, you should create an OverlayImage object. OverlayImage is a class that represents bitmap images that can be used by overlays. Using the factory methods defined in this class, you can create an instance from resources, assets, bitmaps and views. As images to be used as location overlay icons should be handled depending on user devices’ dots per inch (DPI), using Drawable resources is recommended.
The following code example specifies an icon for the location overlay.
locationOverlay.setIcon(OverlayImage.fromResource(R.drawable.location_overlay_icon));
Java
locationOverlay.setIcon(OverlayImage.fromResource(R.drawable.location_overlay_icon));
Kotlin
locationOverlay.icon = OverlayImage.fromResource(R.drawable.location_overlay_icon)
![]()
Size
The width and the height properties specify the size of an icon.
The following code example sets each of the width and height of a location overlay icon to 40 px.
locationOverlay.setIconWidth(40);
locationOverlay.setIconHeight(40);
Java
locationOverlay.setIconWidth(40);
locationOverlay.setIconHeight(40);
Kotlin
locationOverlay.iconWidth = 40
locationOverlay.iconHeight = 40
![]()
If you set width or height to SIZE_AUTO, the default value, the width or height of the icon is adjusted to the size of the image. It is similar to the Android WRAP_CONTENT.
The following code example sets the size of a location overlay icon to SIZE_AUTO.
locationOverlay.setIconWidth(LocationOverlay.SIZE_AUTO);
locationOverlay.setIconHeight(LocationOverlay.SIZE_AUTO);
Java
locationOverlay.setIconWidth(LocationOverlay.SIZE_AUTO);
locationOverlay.setIconHeight(LocationOverlay.SIZE_AUTO);
Kotlin
locationOverlay.iconWidth = LocationOverlay.SIZE_AUTO
locationOverlay.iconHeight = LocationOverlay.SIZE_AUTO
Anchor
Using the anchor property, you can make the position indicated by an image match the position where the location overlay is placed. Anchor is the point on the icon image that will be placed at the coordinates of the location overlay. An anchor point is a proportion value where the top left is (0, 0), and the bottom right is (1, 1).
This property is useful when the default location overlay image is not used. For example, if you specify an image that has a tail at the bottom center as the location overlay’s icon as shown below, the image points to the bottom center but the location overlay is anchored to the map based on the point at the center of the image, which makes a gap between the coordinates of the image and those of the location overlay.
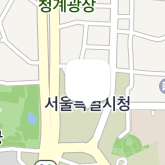
In this case, set the anchor property to (0.5, 1), which means the bottom center, to clear the coordinates difference between the image and the location overlay.
The following code example sets the anchor of a location overlay to the bottom center of the icon.
locationOverlay.setAnchor(new PointF(0.5f, 1));
Java
locationOverlay.setAnchor(new PointF(0.5f, 1));
Kotlin
locationOverlay.anchor = PointF(0.5f, 1f)
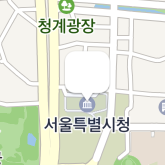
Sub icon
A sub icon is an additional icon that is placed behind the main icon. Aside from the main icon, you can specify the image, size and anchor of a sub icon. As a sub icon cannot receive events, it is useful to display additional information.
The names of the properties of a sub icon are mostly the same as those of the main icon, except that they begin with sub, such as subIcon, subIconWidth, subIconHeight, and subAnchor If subIcon is set to null, a sub icon is not shown.
The following code example specifies a sub icon for the location overlay.
locationOverlay.setSubIcon(
    OverlayImage.fromResource(R.drawable.location_overlay_sub_icon));
locationOverlay.setSubIconWidth(80);
locationOverlay.setSubIconHeight(40);
locationOverlay.setSubAnchor(new PointF(0.5f, 1));
Java
locationOverlay.setSubIcon(
    OverlayImage.fromResource(R.drawable.location_overlay_sub_icon));
locationOverlay.setSubIconWidth(80);
locationOverlay.setSubIconHeight(40);
locationOverlay.setSubAnchor(new PointF(0.5f, 1));
Kotlin
locationOverlay.subIcon =
    OverlayImage.fromResource(R.drawable.location_overlay_sub_icon)
locationOverlay.subIconWidth = 80
locationOverlay.subIconHeight = 40
locationOverlay.subAnchor = PointF(0.5f, 1f)
![]()
Circle
You can add a circle to highlight the location overlay. A circle is drawn behind the sub icon, and its size, color and outline can be specified.
Size
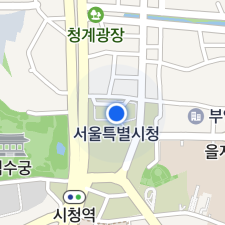
The circleRadius property specifies the radius of a circle. Set the radius to 0, and the circle does not appear. Since the radius is measured in pixels, you need to use CircleOverlay that shows the geographic size, in order to represent the information such as location accuracy.
The following code example sets the radius of a circle for the location overlay to 100 px.
locationOverlay.setCircleRadius(100);
Java
locationOverlay.setCircleRadius(100);
Kotlin
locationOverlay.circleRadius = 100
Fill color
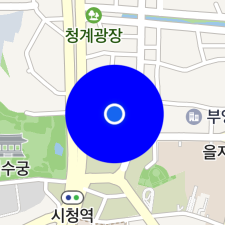
The circleColor property specifies the fill color of a location overlay’s circle.
The following code example sets the fill color of a location overlay’s circle to blue.
locationOverlay.setCircleColor(Color.BLUE);
Java
locationOverlay.setCircleColor(Color.BLUE);
Kotlin
locationOverlay.circleColor = Color.BLUE
Stroke width
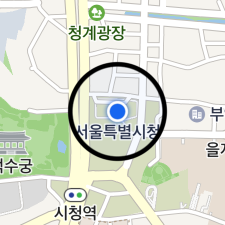
The circleOutlineWidth property specifies the stroke width of a circle. Set the property to 0, and no outline is drawn.
The following code example sets the stroke width of a location overlay’s circle to 10 px.
locationOverlay.setCircleOutlineWidth(10);
Java
locationOverlay.setCircleOutlineWidth(10);
Kotlin
locationOverlay.circleOutlineWidth = 10
Stroke color
The circleOutlineColor property specifies the stroke width of a circle.
The following code example sets the stroke color of a location overlay’s circle to green.
locationOverlay.setCircleOutlineColor(Color.GREEN);
Java
locationOverlay.setCircleOutlineColor(Color.GREEN);
Kotlin
locationOverlay.circleOutlineColor = Color.GREEN
